Youtube has presented me with many videos on making lipstick with crayons. I was a complete skeptic and was not sure about putting crayons on my lips. I thought I would give this odd internet invention a try. Crayola has always been my favorite brand and they regularly advertise the non toxicity of their products which put me more at ease...
For this, I went to my local Tescos to pick up the supplies as per Promise Tamang Phan's lovely video tutorial; Coconut Oil, Crayons, and small plastic mixing cups.

My local Tesco only sold glitter crayons which was not an upset for me at all! I love glitter. Bought a tub of Vita Coco coconut oil and the closest thing to mini plastic tubs was these hard plastic shot glasses. though lidless this was an experiment I wanted to keep as cheap as possible.

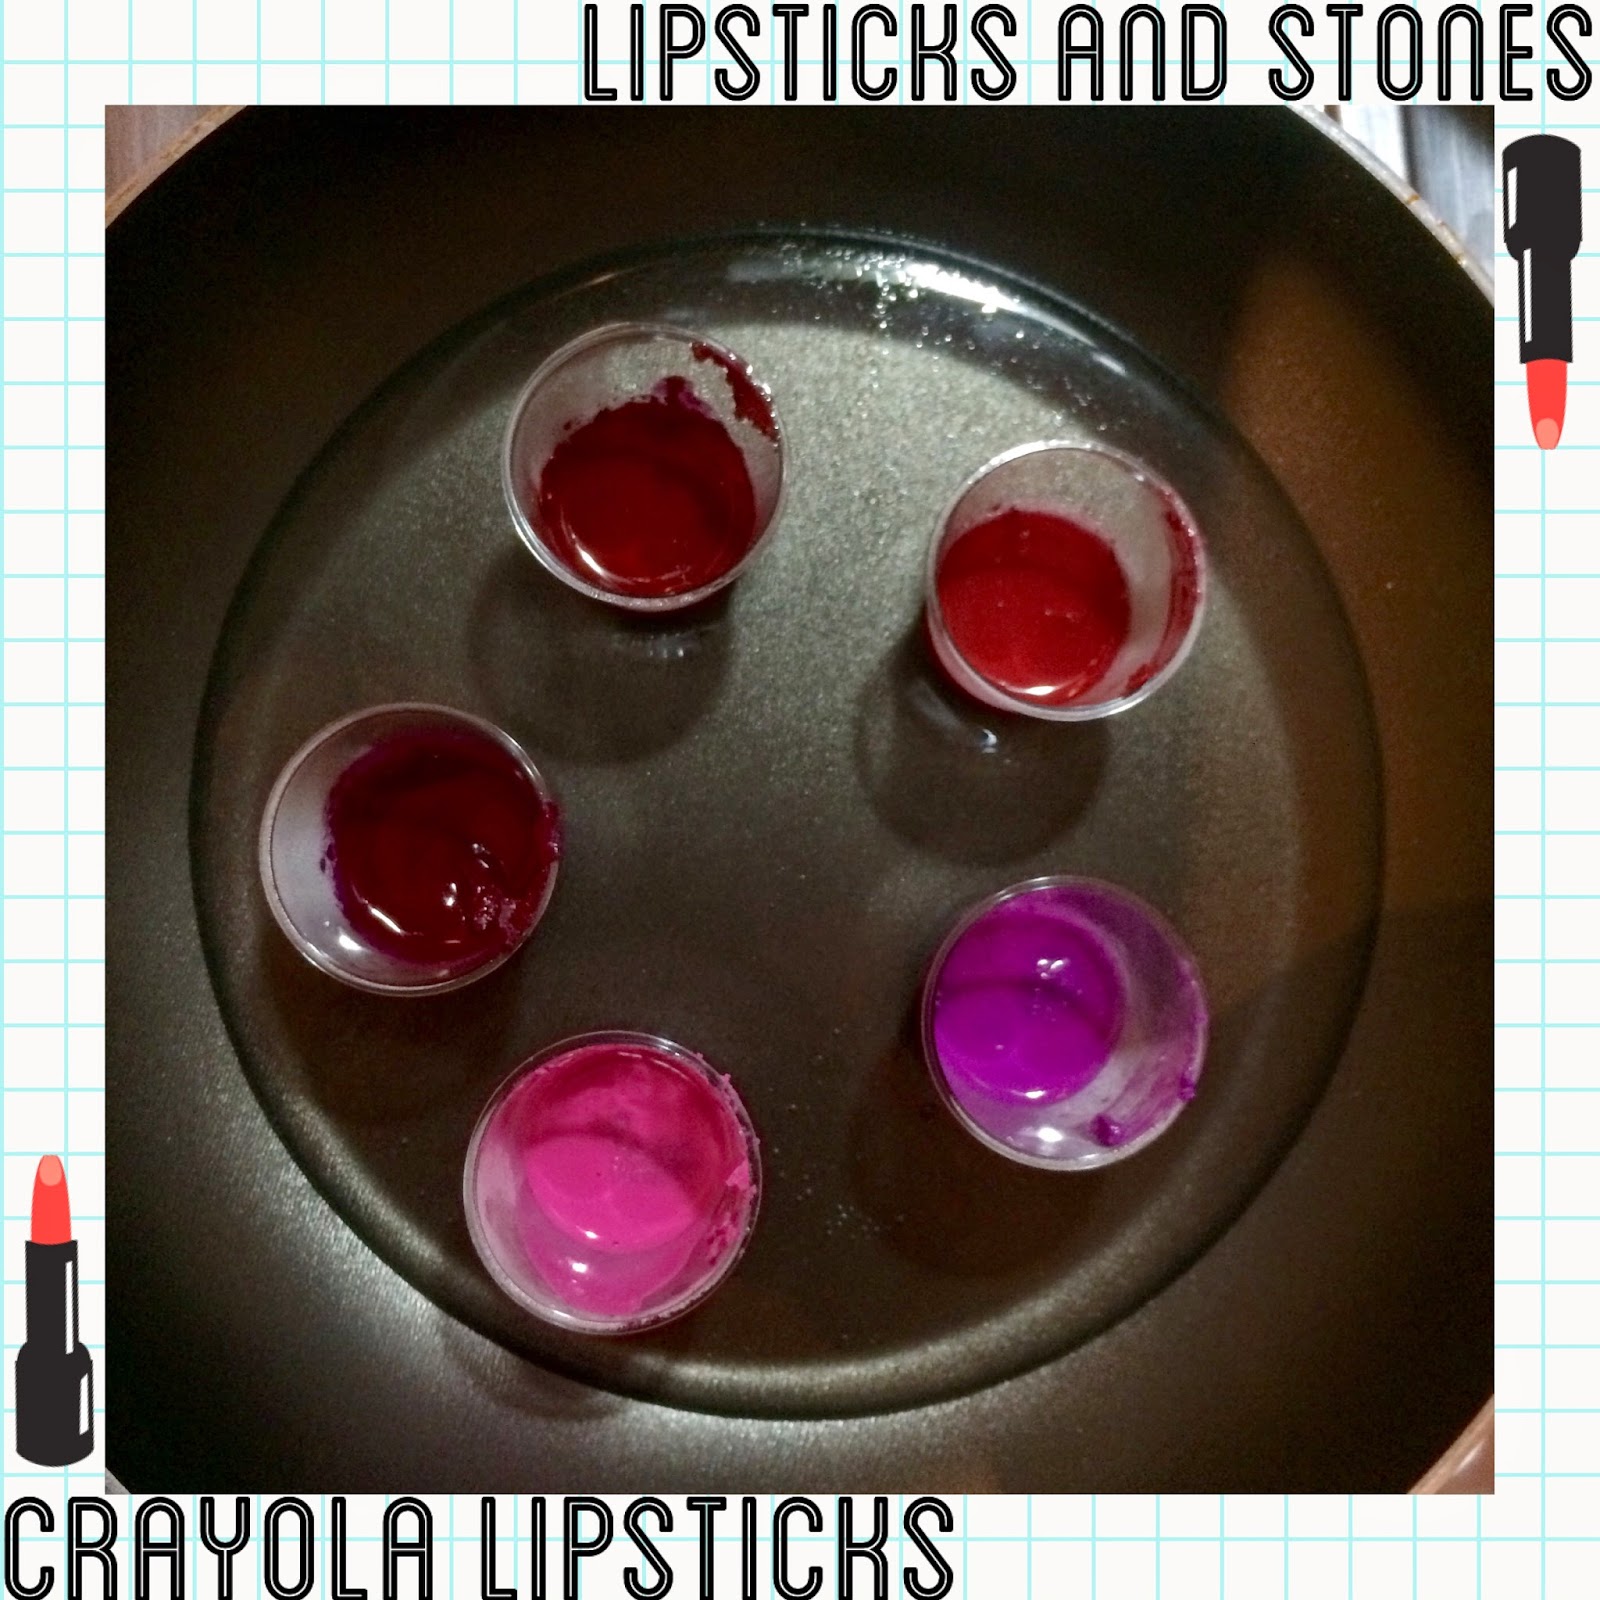
There were five colors in the pack that I thought suited as conventional lipstick colors.
Glitter Crayons do not have names so I have appropriately named them, from left to right:
Dark Red, Berry, Red, Purple and Princess Pink

To prep for the melting and mixing, I got a non stick skillet and put the hob on the lowest heat setting just to get the skillet warm enough to stay warm and then turned it off. I heated my kettle to boiling and prepped my cups in the skillet with half an inch of the hot water.
Each cup was prepped with a teaspoon of coconut oil which melts very quickly to get nice and warm so when i add the crayons they will melt a lot easier.

The crayons had their paper wrappers removed and i snapped them into chunks. For faster melting time, you can use a knife and mince the crayon into tons of very small pieces.

Now we combine everything. melting coconut oil, crushed crayons, and the heat of hot kettle water.
All the videos I watched made it seem like this melted quite quickly but it too ages! Each pot took about 10 or 15 minutes to melt completely and needed regular stirring for the coconut oil to completely mix with the crayon wax. The more crayon you use, the thicker the coverage but also the more like a crayon it will dry to. One spoon of coconut oil for every crayon.
For a soft satin finish, add more coconut oil.


On the top of my hand here, with flash, these are my colors!
They have the texture of Vaseline lip care tins and a lot less coverage on the lips than expected but it is still a lovely soft sheen.
Coconut Oil is extremely hydrating and restorative for skin so during the winter using these will prevent lip chapping
while looking extremely fabulous!
There were five colors in the pack that I thought suited as conventional lipstick colors.
Glitter Crayons do not have names so I have appropriately named them, from left to right:
Dark Red, Berry, Red, Purple and Princess Pink
To prep for the melting and mixing, I got a non stick skillet and put the hob on the lowest heat setting just to get the skillet warm enough to stay warm and then turned it off. I heated my kettle to boiling and prepped my cups in the skillet with half an inch of the hot water.
Each cup was prepped with a teaspoon of coconut oil which melts very quickly to get nice and warm so when i add the crayons they will melt a lot easier.
The crayons had their paper wrappers removed and i snapped them into chunks. For faster melting time, you can use a knife and mince the crayon into tons of very small pieces.
Now we combine everything. melting coconut oil, crushed crayons, and the heat of hot kettle water.
All the videos I watched made it seem like this melted quite quickly but it too ages! Each pot took about 10 or 15 minutes to melt completely and needed regular stirring for the coconut oil to completely mix with the crayon wax. The more crayon you use, the thicker the coverage but also the more like a crayon it will dry to. One spoon of coconut oil for every crayon.
For a soft satin finish, add more coconut oil.
All melted I start to see them as lipsticks. I sat the cups on a paper towel and laid a piece of cling film of the top to avoid dust drying into my little lovelies. Because all the wax and oil where in the cups, there was virtually no mess afterwards
Finished, they have dried and look like shot glasses of homemade lipstick!
Still worried these are not going to give a good look on skin.
They have the texture of Vaseline lip care tins and a lot less coverage on the lips than expected but it is still a lovely soft sheen.
Coconut Oil is extremely hydrating and restorative for skin so during the winter using these will prevent lip chapping
while looking extremely fabulous!
Experiment Completed. I will probably never do this again because of the really light coverage and because I am a lipstick snob but it did work and it was insanely easy and inexpensive.
For the DIY lover, this is for you!
No comments:
Post a Comment
always looking for comments, feedback, and your thoughts... talk, talk away!